
Blog · 22 October 2026 · 4 min read
Limestone Floor Restoration After a Leak — Stripping, Drying, Honing & Sealing
Updated: video includes the honed and sealed finish
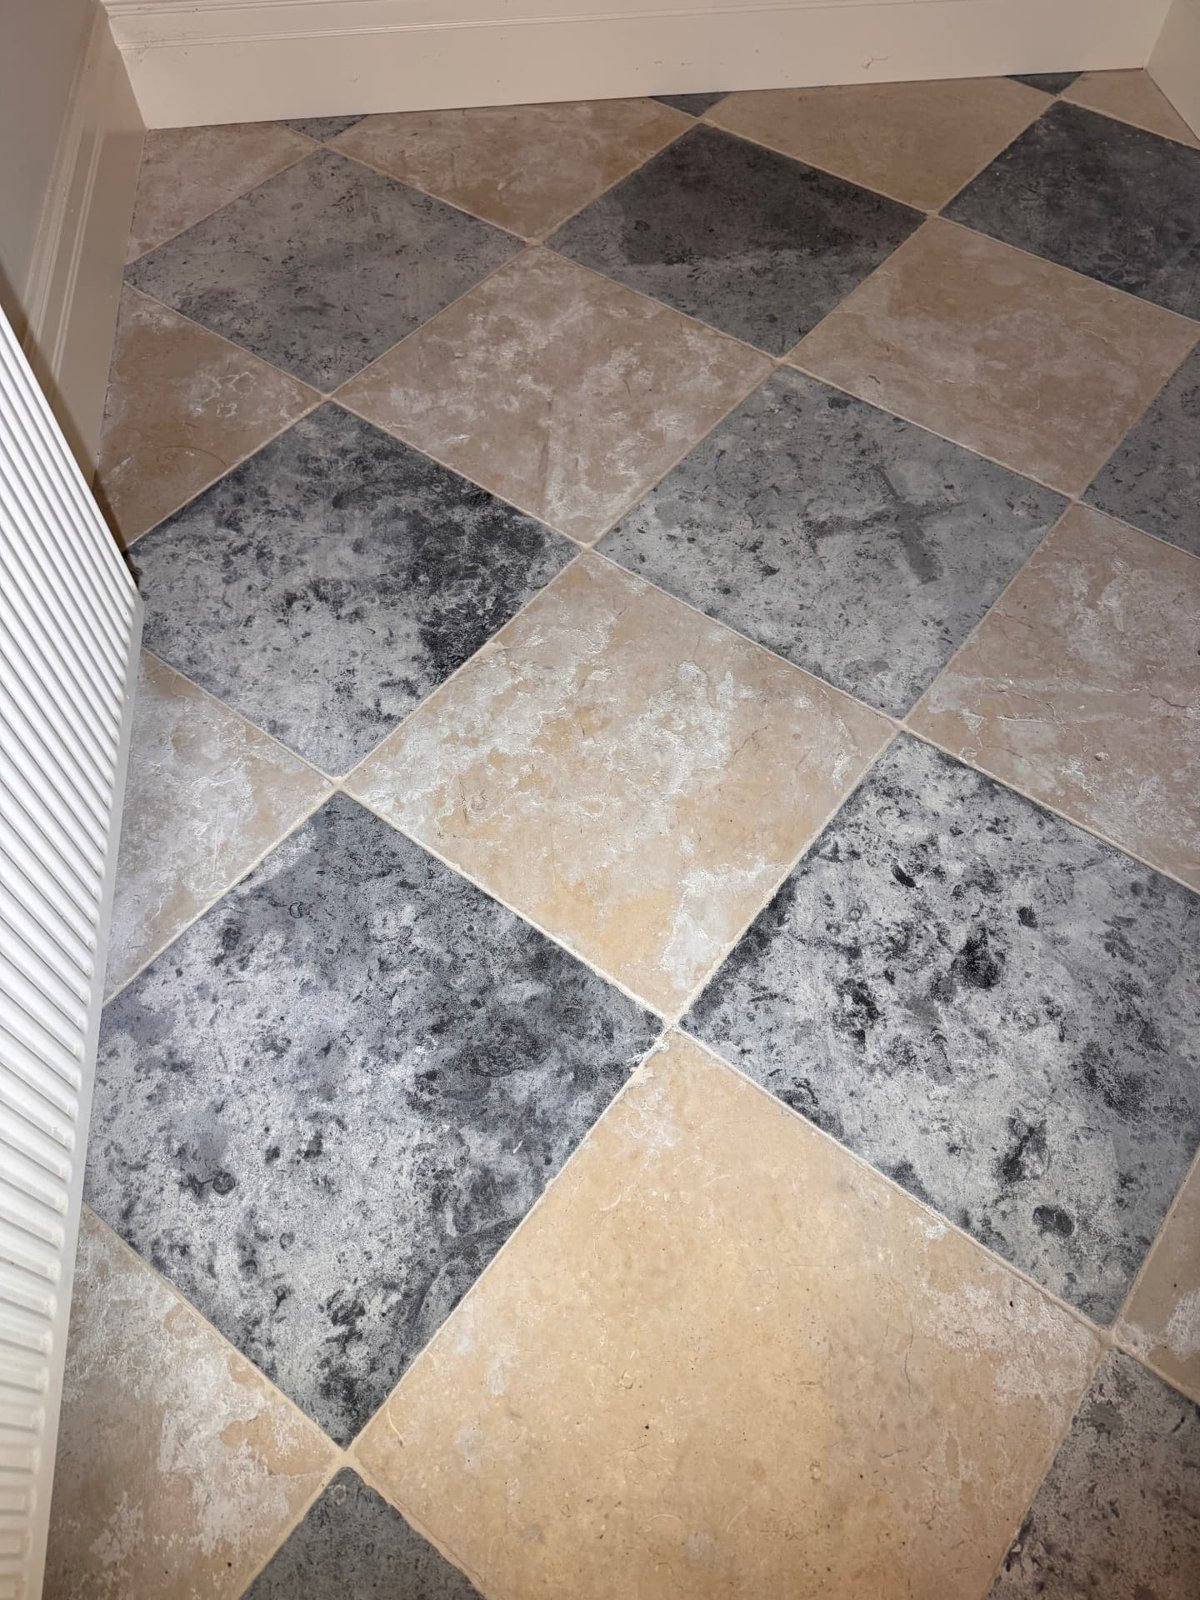
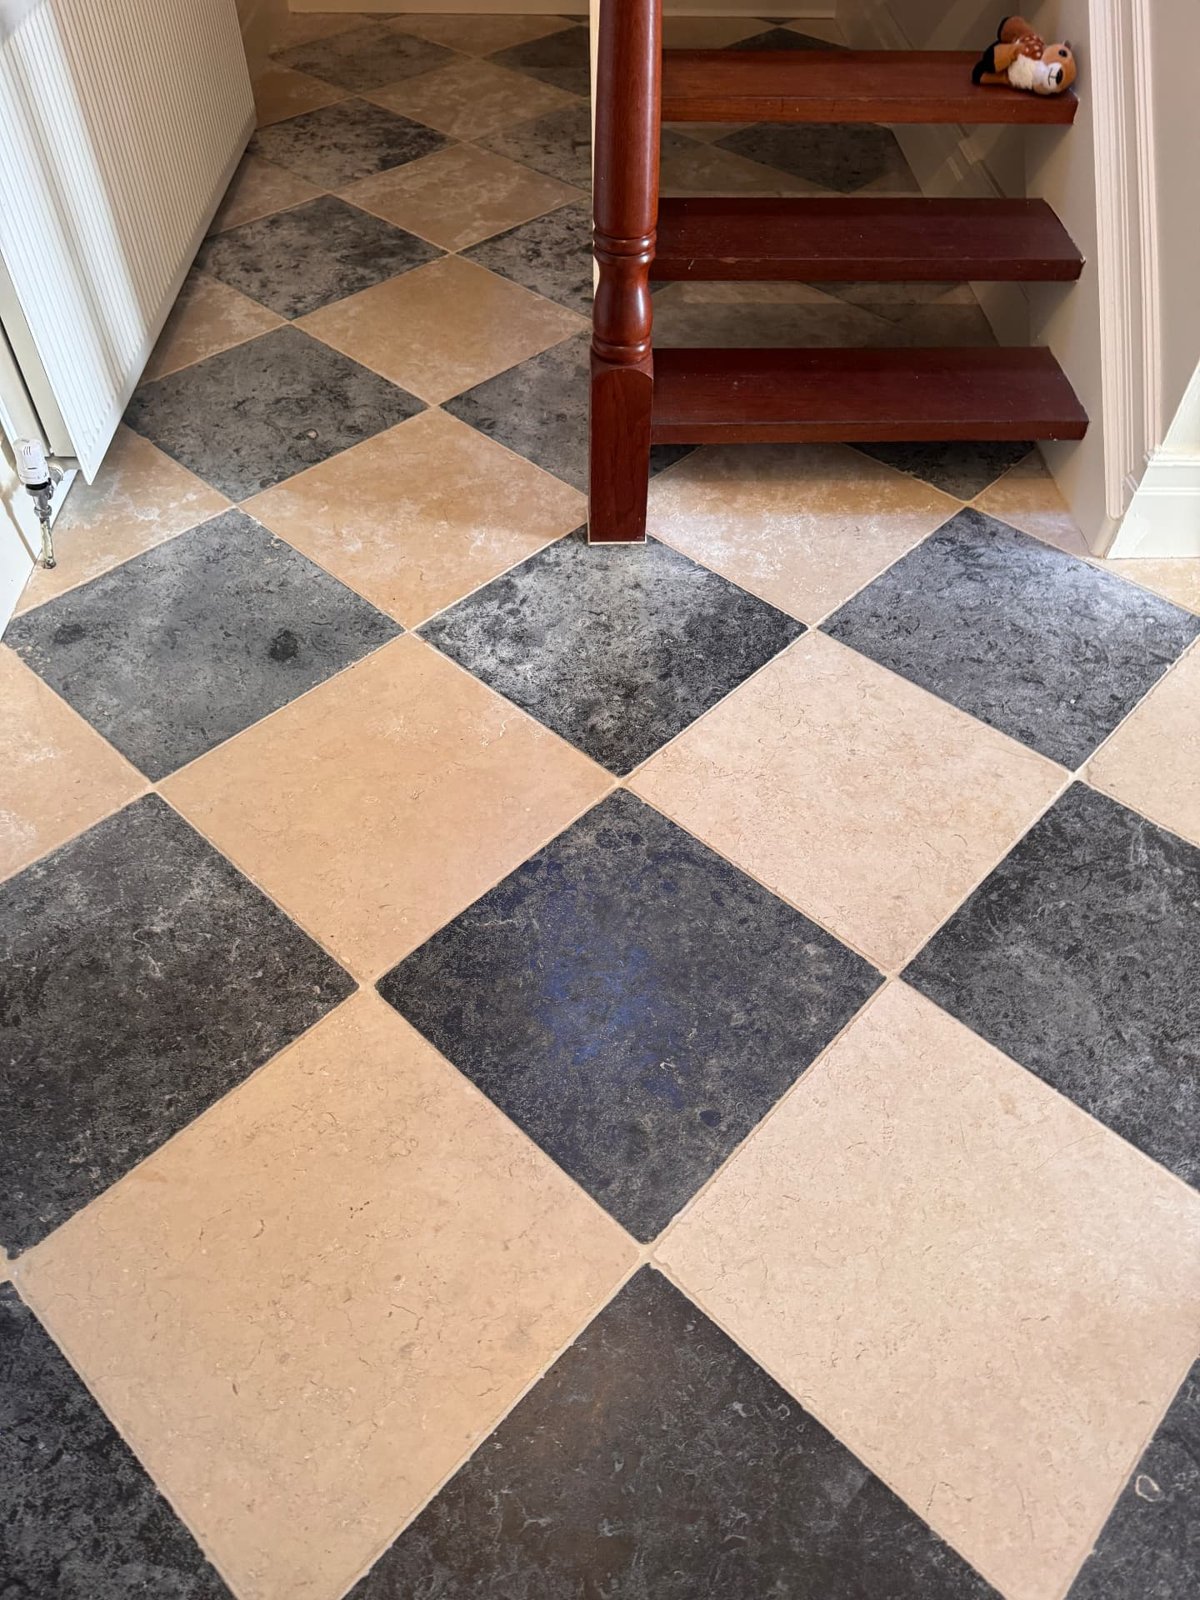
Before stripping: white haze and patchy marks on the coated limestone. The leak came from underneath the floor; the damage also included cracking and tiles popping up, not just a change in appearance.
This limestone hallway was damaged by a leak coming from beneath the tiles — not a spill or water sitting on top. The floor had a non-breathable sealer over the limestone, and the damage included cracking and tiles popping up. Alongside that physical damage, the surface had become hazy and patchy. The photographs below show the earlier sealer-stripping stage. We opened the floor up to breathe and let moisture escape before further work. The updated video shows the full sequence, ending with the floor honed and sealed.
Why a non-breathable sealer matters when moisture comes from below
Limestone can absorb moisture through its pores and small fissures. Water from a leak beneath a floor can wet the bedding and reach the underside of the stone. A non-breathable, film-forming coating on top restricts water-vapour escape through that surface, so it can slow drying while the floor is being wetted from below.
Prolonged dampness can cause dark patches and discolouration in stone, while moisture beneath some coatings can contribute to whitening, blistering or loss of adhesion. Water can also carry soluble salts from the bedding towards the surface. When it evaporates, those salts may leave a white deposit called efflorescence. A white haze alone does not prove which of these processes is responsible; coating residue and salts need to be distinguished during assessment. The technical guidance linked below explains these risks, rather than diagnosing this floor from photographs.
Cracking and tiles popping up: more than a surface problem
On this job, the leak was accompanied by cracked and lifting tiles. Some moisture-sensitive stones can deform when wet, stressing their bond to the bedding. Movement in the floor, inadequate movement allowance and an already weak bond can also contribute to tiles lifting or tenting. Those are possible mechanisms that require an on-site assessment, not proof that this particular limestone reacted in that way.
It would be too simple to say that trapped water pressure alone popped the tiles. The leak, the restricted drying and the condition of the stone, bedding and bond all matter. Removing the sealer does not mend a crack or resecure a loose tile, and a cleaner-looking surface does not mean the floor is sound.
The process: stripping the failed sealer
The stage shown here is removal of the old surface treatment. We use Faber products for our stone-care work, with the stripping treatment selected for the coating and tested on a small area first. The aim is to remove the non-breathable layer, rather than cover it with another treatment. Stripping residue is extracted and the surface rinsed as required by the product instructions.
Cracked or lifting areas need assessment before machine work; they cannot simply be treated as a normal polishing surface. Stripping can remove a barrier to drying and reveal more of the floor's condition, but it does not remove moisture already in the bedding or resolve the damage underneath.
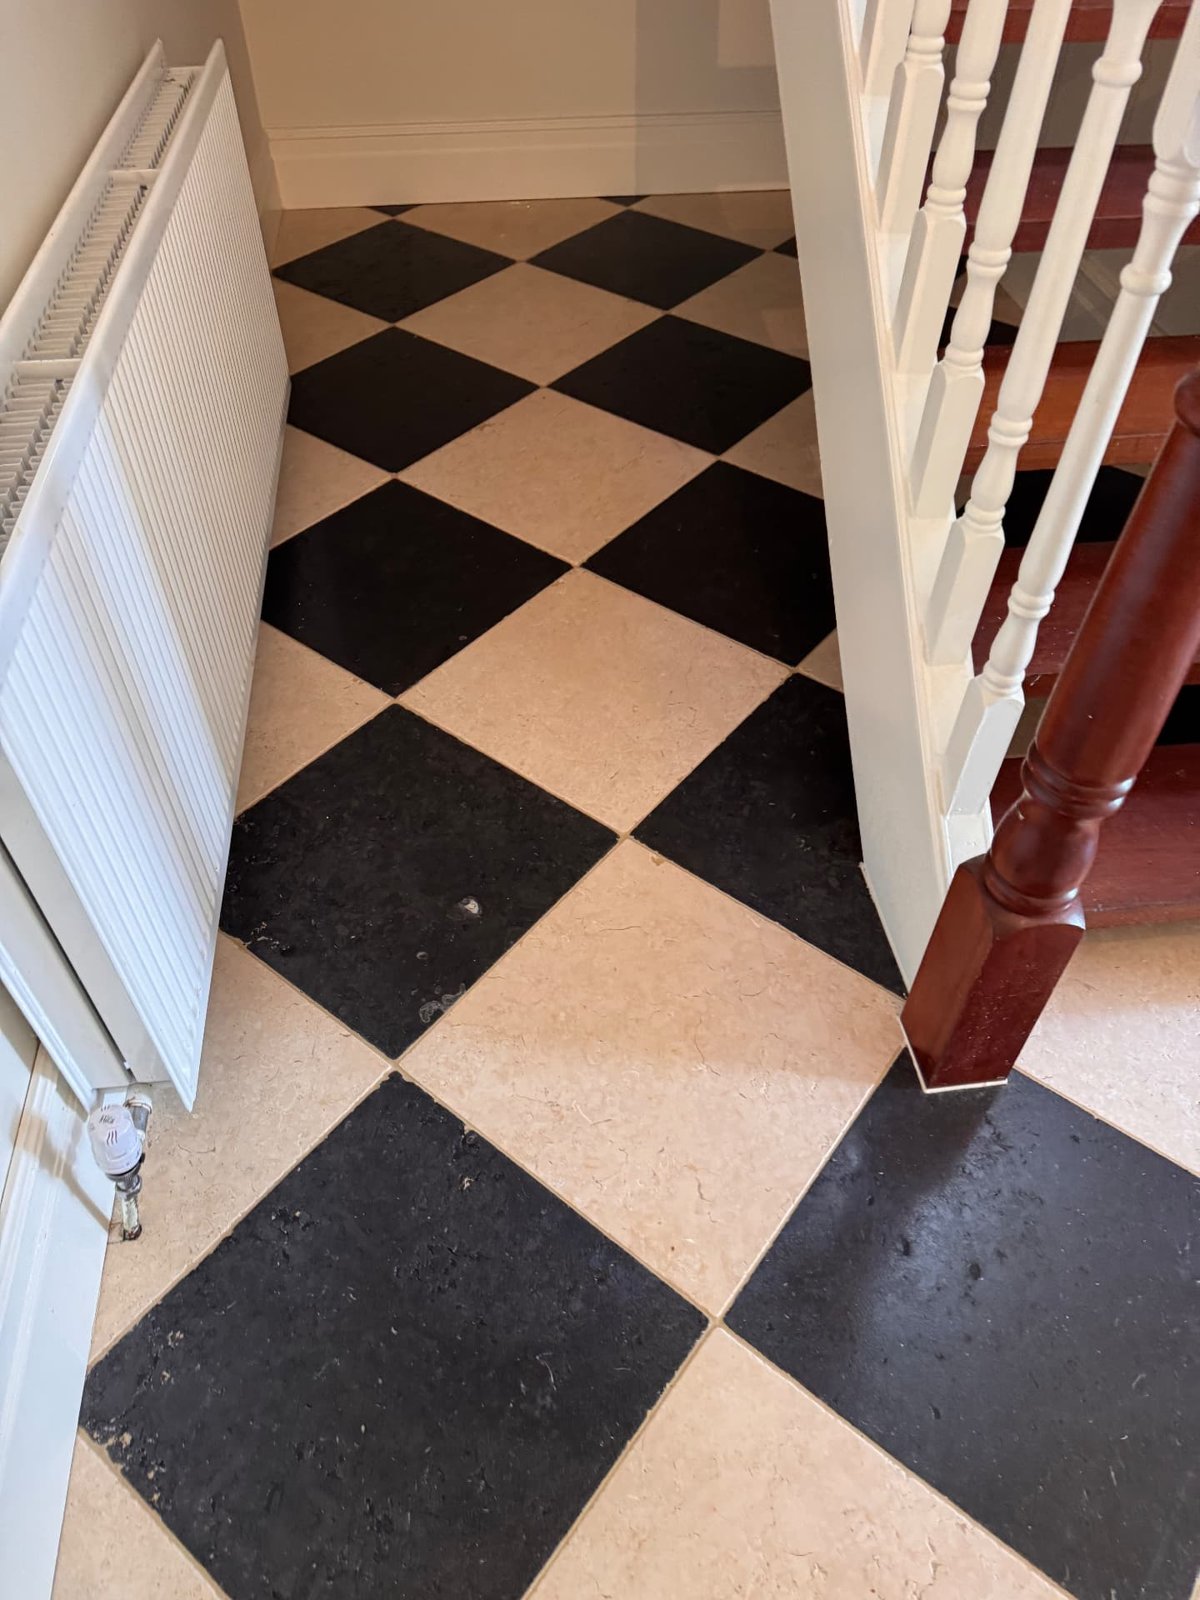
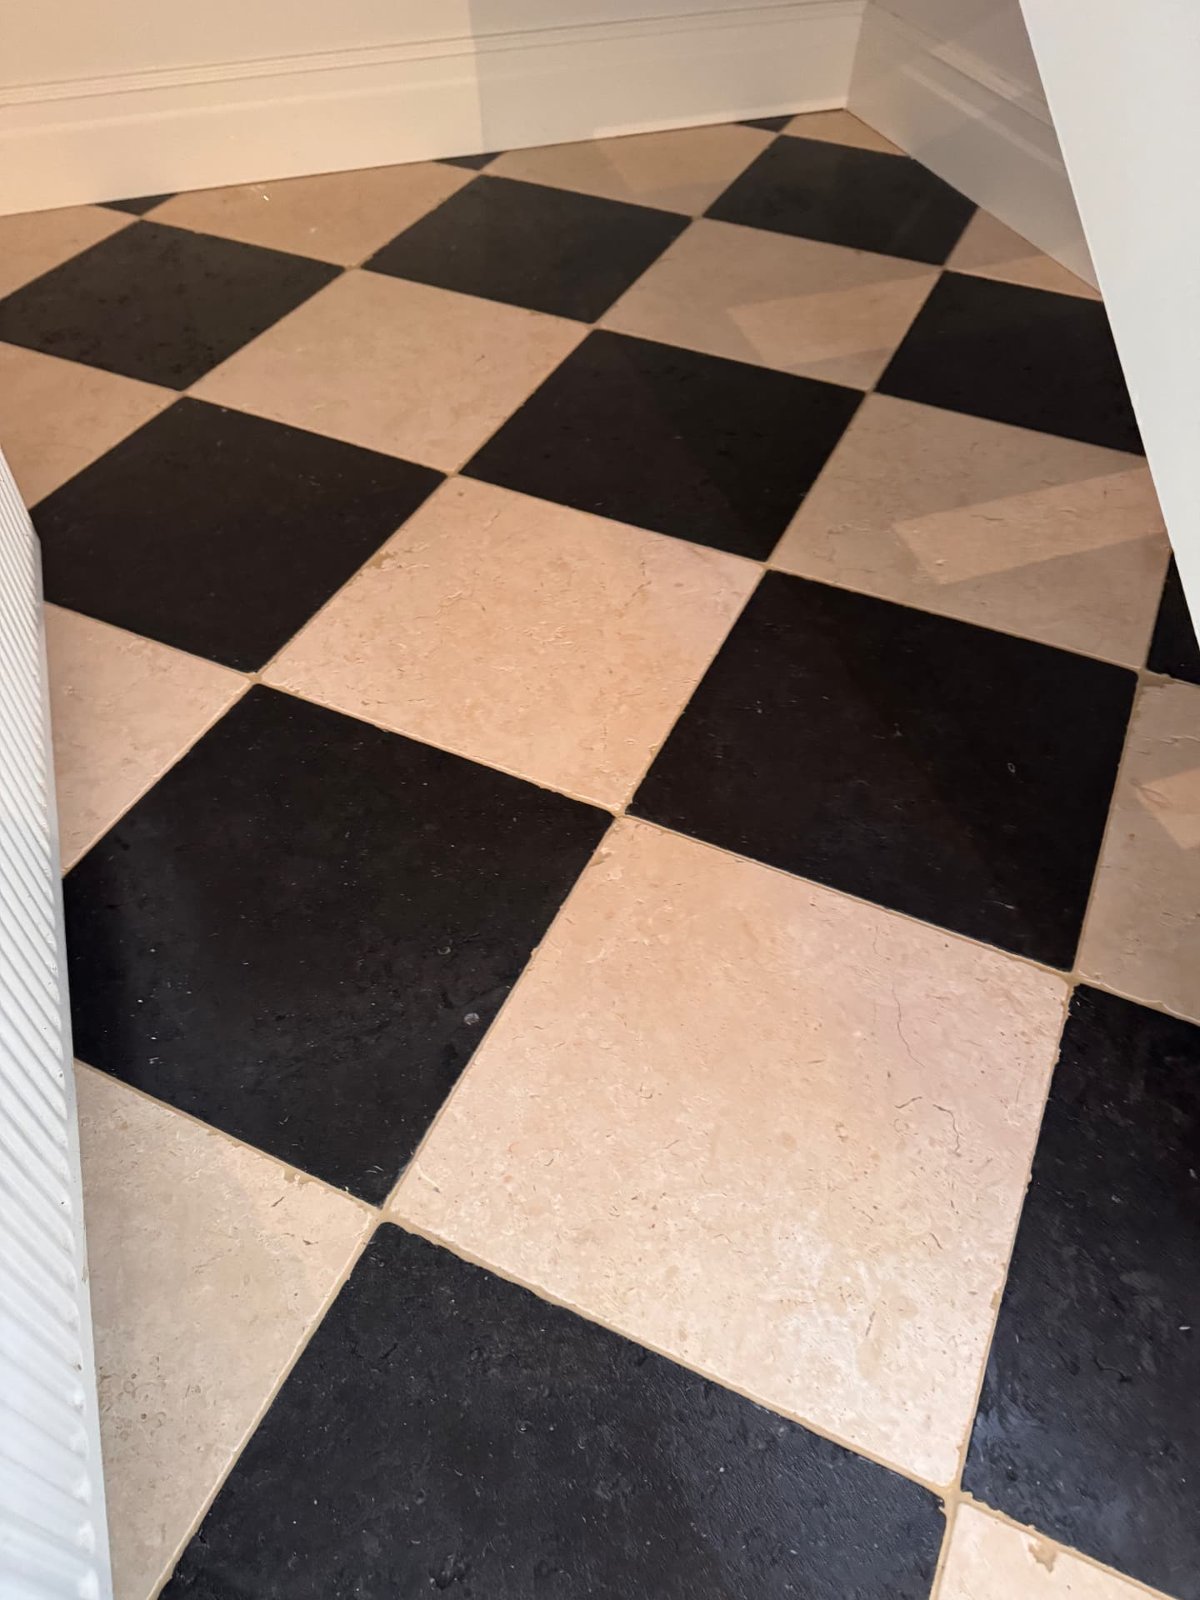
Letting the floor breathe — and measuring before we proceed
The source of the leak must be dealt with before any finishing treatment. During the drying stage, we left the floor to breathe so that moisture could escape from the stone and the bedding beneath it. We use moisture meters to measure and monitor moisture content during this process before we can proceed with further work. Looking dry on top is not enough: the readings help us assess whether drying has progressed sufficiently for the proposed treatment, following its requirements and the measurement method used. Drying time and moisture readings are not included here.
The cracked and lifting areas also need assessment before deciding what further surface work is suitable. Honing and polishing are only considered once the floor is dry and stable.
Sealing remains optional. If suitable for the stone and its condition, a breathable, non-film-forming Faber impregnating sealer can provide stain resistance while allowing water vapour to pass.
The updated video now shows the finished floor after honing and sealing, alongside the earlier damage, stripping and drying stages.
If a leak has left your limestone, marble or tile floor looking hazy or patchy, get in touch to discuss the condition of the surface and whether cleaning or polishing is suitable. Cracked or lifting tiles need separate assessment; our surface treatments do not resolve that damage. See our limestone floor cleaning in Dublin service.
Leak damage on a limestone or stone floor?
Free, no-obligation assessments across Dublin, Kildare, Wicklow and Meath.